Description
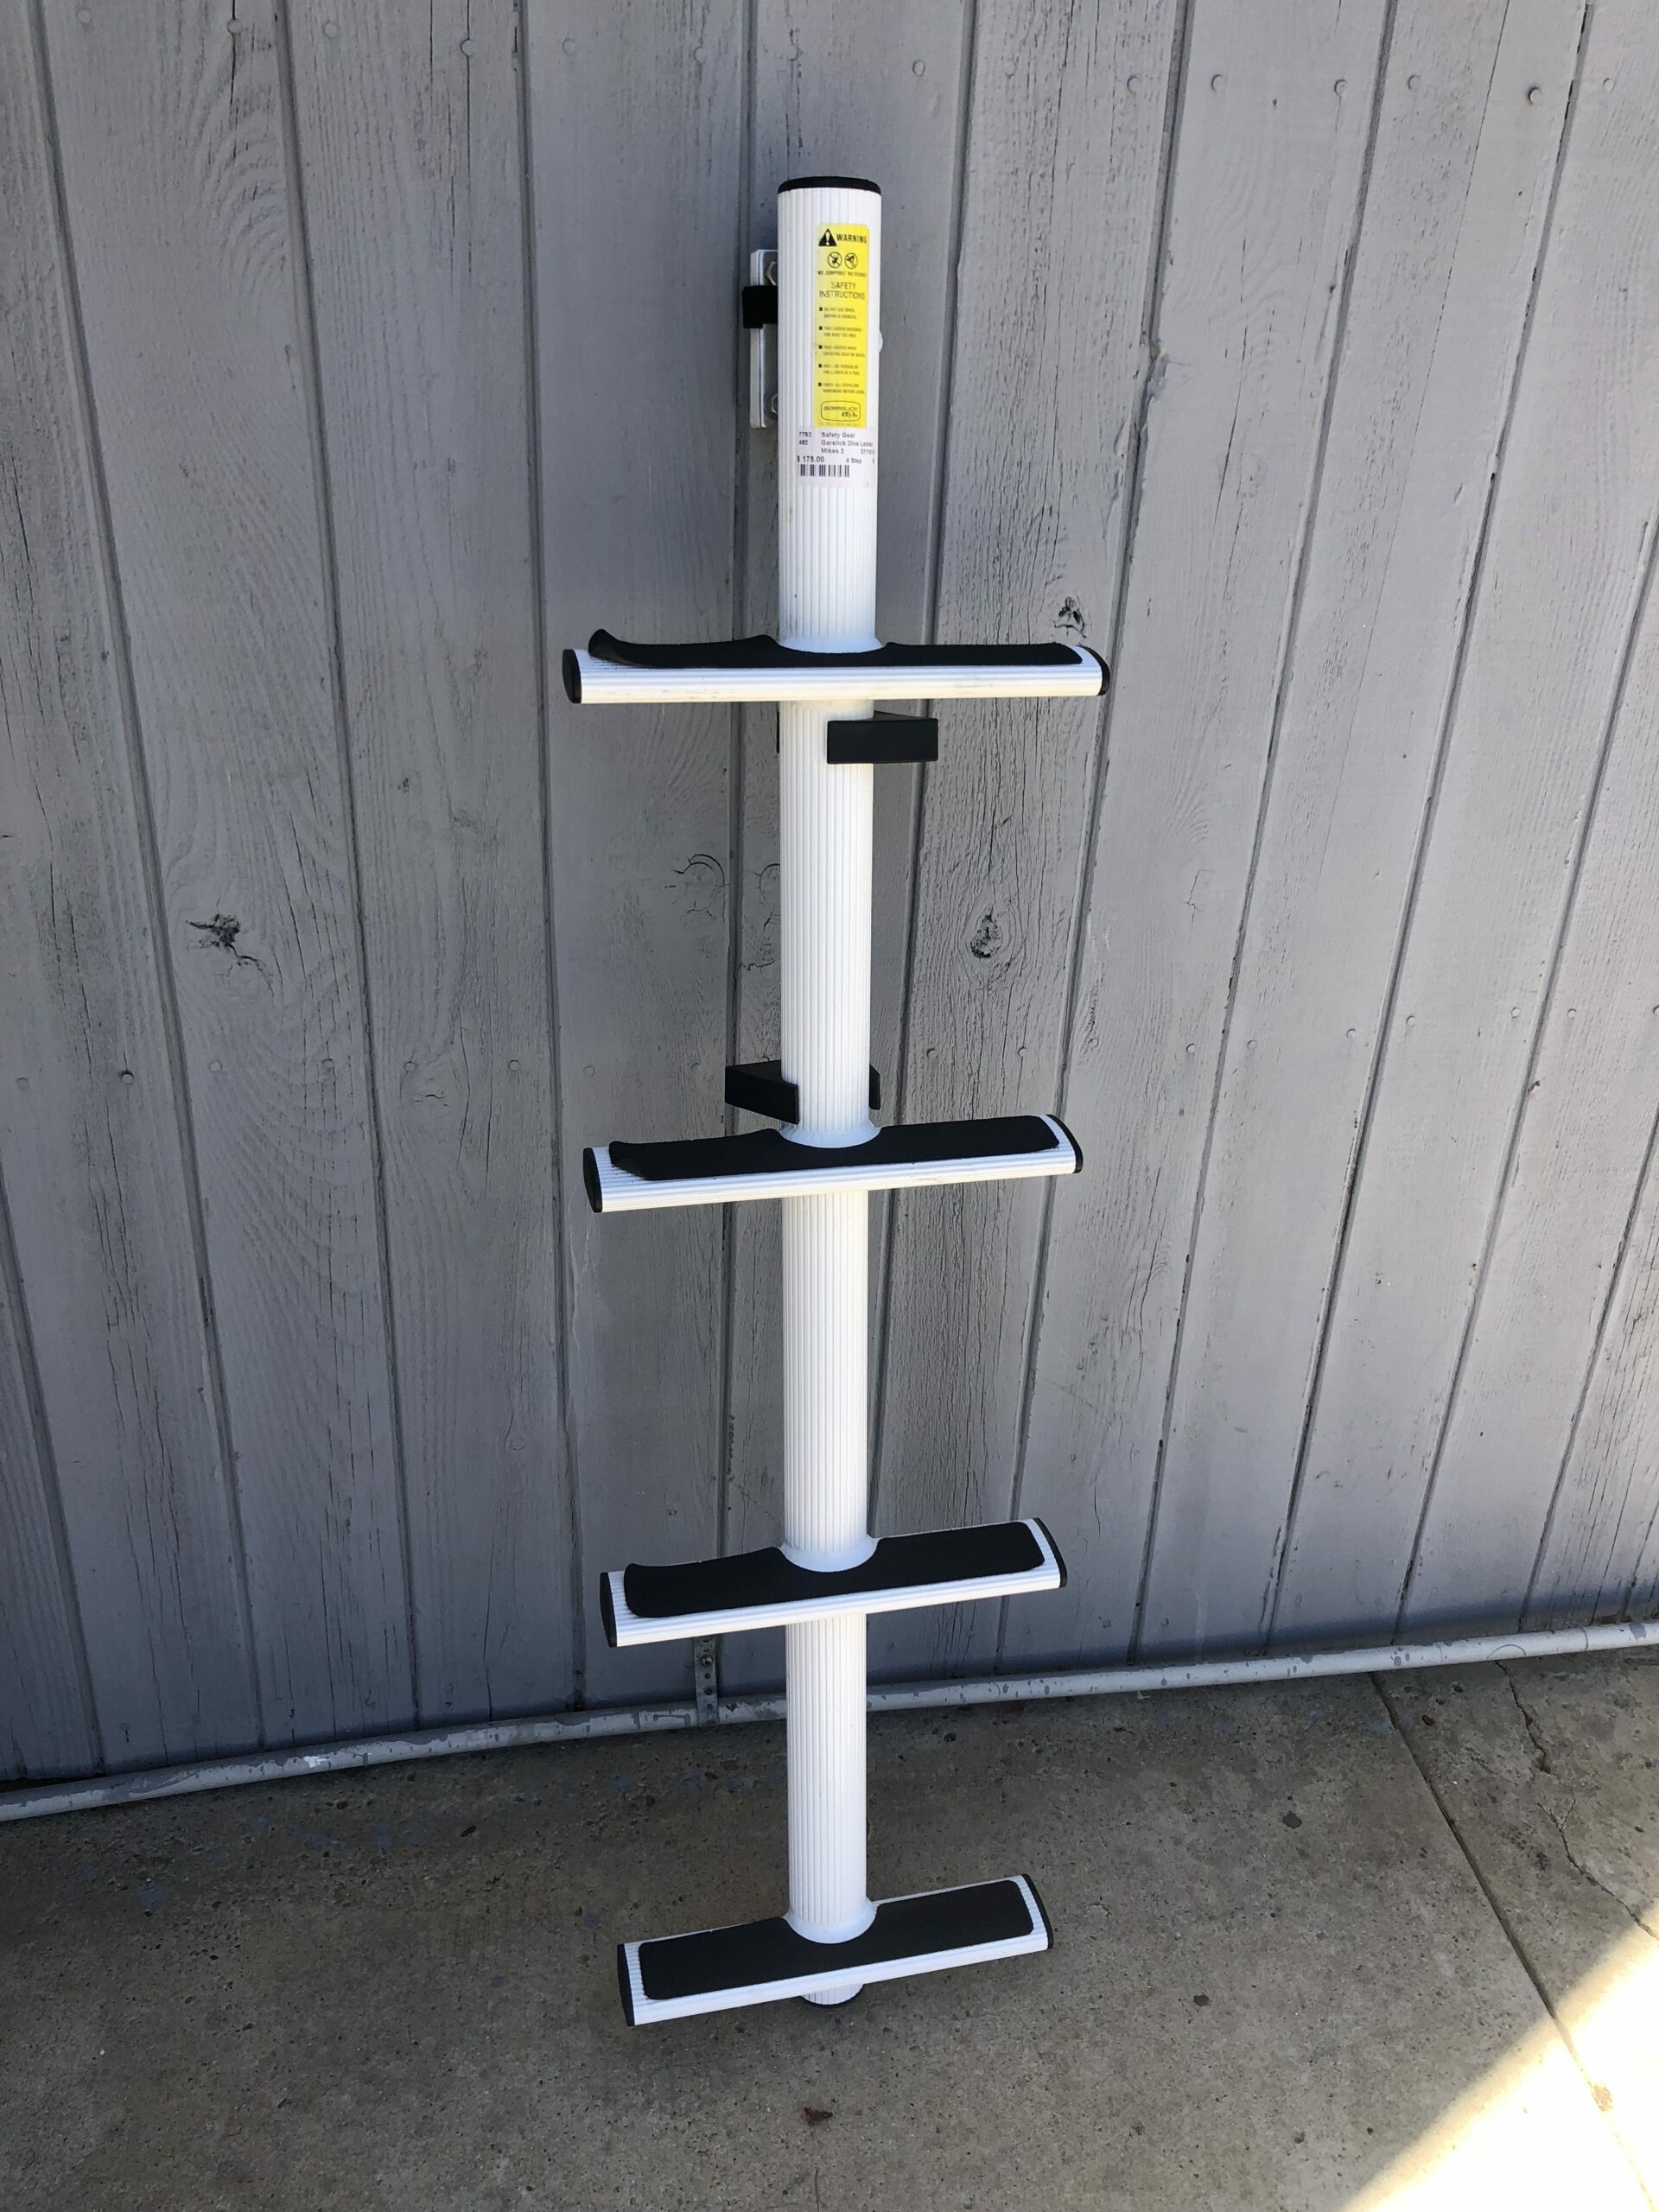
Angled design for stair-like ease of boarding
2 1/4″ diameter center vertical allows easy use with diving gear
Oval steps with non-skid surface
Heavy duty – rated to 400 lbs. (181 kilos) boarding weight
Designed for all vertical, horizontal, and breakaway mounting hardware options
Stainless steel quick release transom mounting bracket
4 Step Ladder measures 48″ long and 13″ wide
Installation Instructions
HOW TO MOUNT GARELICK SPORT-DIVER LADDER
Mounting Instructions
Choose the most suitable side of transom for mounting ladder.
Locate a place on the transom where the ladder will mount and not interfere with the turning and lowering operation of your motor. Determine the actual waterline when the boat is at rest. Mark this location in both the horizontal and vertical direction.
Locate the ladder on this mark and slide it up to the desired mounting height. It is optimal to have at least two steps in the water for ease of boarding.
Mark the ladder’s potion at the top of mounting bolt.
NOTE: This line will locate the top two holes for the mounting plate.
Check the inside of the transom where the mounting is proposed. Verify that there is ample space to install a backing plate (minimum size 4” x 5 ½”) that will support the ladder installation.
A 4” x 5 ½” minimum flat area or the size of your backing plate is required for a secure installation.
NOTE: The backing plate should be made of either aluminum, marine plywood or some other suitable non-compressive material
Mark four mounting plate hole locations on your transom or transom extension bracket using the plate as your template.
NOTE: It may be necessary to make an external shim or modify the mounting substrate to achieve the proper ascent angle (5 to 10 degrees) for your ladder. Drill one 11/32” or 3/8” hole through your transom, noting the angle of the mounting substrate hole. These holes are perpendicular to the mounting face plate, not the transom. When drilling, this hole angle should be used to insure a proper installation. Place the mounting substrate and faceplate against the boat and loosely mount it with the hardware that you have selected for proper installation.
Level the bracket, mark and drill the next hole. Check the ladder for level, make adjustments if necessary and then drill the other two holes.
Loosen the mounting faceplate enough to install roll pin into the mounting substrate. Place the locking bar into the substrate.
NOTE: The notch in the bar faces down. Slide the locking bar’s operation to insure it slides back and stops.
Put a bead of adhesive caulk around the perimeter of the mounting holes and all edges of the mounting substrate, coat the bolt threads with anti-seize compound and secure the mounting substrate in place by tightening all four mounting bolts.
Mount securing clips at desired location with selected stainless steel hardware. This will insure that the ladder will not rotate or slide when boat is underway.
Safety:
Do not use when motor is running.


